How to build a website
How I built and designed this website from scratch. Features working with HTML, CSS, Flask, Jijna, and SQLAlchemy (along with messing around with DNS and HAProxy)
Genesis
In the beginning, there was nothing. Then, there was the Internet. And it was abismal good.
I discovered you could buy a domain name in late 2021 and that joelcoulon.com was available. Piggybacking off my dad's Ionos (formerly 1&1) business account, I purchased joelcoulon.com and did ...... nothing.
Waiting...
I soon discovered that whilst you can do anything you want with a website, 99% of the time, you have to pay for it. I had little to no web dev experience at the time and, as a student, had no money to pay for the services required to run a website. Hence joelcoulon.com just sat there, existing as Ionos' default landing page.
Everyone Likes Emails right?
One service that I was willing to shell out the £10/year for was email. This allowed me to have any *@joelcoulon.com email address I wanted. I set up 2 emails: one for personal use; and one to give to companies whenever they ask for my email address.
Because Ionos isn't a typical email provider, the only way to add their various accounts to an email client is by manually adding ports and server addresses. As a result, I got some fun insights into the workings beind the assorted email protocols.
DNS (Don't Need ioNos)
Fast forward to late 2022, I am now a computer science student at the University of Warwick. I have just completed a module on web development; I'm now a member of UWCS and therefore have both the ability and the infrastructure to host my own website.
I created an initial website on the UWCS' static website server: hopper. This was made in about 5s and was simply a h1 title saying the famous Hello World. This was hosted at joelcoulon.uwcs.co.uk (this now 404s due to recent static site infrastructure changes).
I now needed to point joelcoulon.com to this website. This required me to update DNS records. The initial (slightly cursed) method for this was to set up an A record pointing to the IP address of hopper (the server that hosts the static sites) and add a HAProxy rule to redirect all traffic from joelcoulon.com to joelcoulon.uwcs.co.uk.
Doing this revealed a flaw in any infrastructure changes: any change I needed to make to the domain had to be run through my dad, as only he had the password to the account. This was not ideal. As a result, I decided to migrate the domain to a new provider, which I had control over. Eventually, I decided to transfer to Cloudlfare as they offered a cheap and flexible service where, whilst they would gladly sell you a service, they allowed you to implement your own solutions.
The migration was uneventful as I had done my research beforehand and had made a detailed list of instructions for dad and me. The only issue was that I now had no email address.
More Emails!!!!
What do you get when you have a domain on Cloudlfare and an email on Ionos? A problem. Namely, everything breaks.
Cloudlfare is primarily a DNS provider; they only offer email forwarding. Luckily this is free, so I can set up any *@joelcoulon.com email address to forward to any other email address.
However, I still wanted to be able to send emails as *@joelcoulon.com. Luckily, Gmail has this neat feature called "send mail as", which allows you to add an alias to your Gmail account. Following the steps laid out in this article, I was able to set up my Gmail account to send emails.
The only good flask is one with alcohol in it
Now, joelcoulon.com was still displaying a simple "Hello World". Now I had the means and the ability to, I could create an actually decent website. I initially created a simple raw-HTML page with a few links to my various social media accounts to act as a placeholder whilst I worked on a better website.
As I had learnt the Flask, jinja, and SQLAlchemy stack in my web development module, it made sense that this would be what I would use to create the website. Flask cannot be served statically, so I needed to put it in a docker container to host it on UWCS' docker hosting service: portainer. UWCS has a handy tutorial on how to intially set up a flask app for production and dockerise it.
Initially, I recreated the raw-HTML as a flask application, which was then hosted at https://joelcouloncom.containers.uwcs.co.uk. This unveiled a problem: whilst the website was showing up fine on the UWCS site, it was not showing up on joelcoulon.com. As part of the debugging process, I had updated the DNS backend to be a CNAME record which allowed us to remove some redundant HAProxy rules. After a couple days of trying to figure out how HAProxy was working, we realised there was a default rule that meant that any traffic to joelcoulon.com was being directed to Hopper, not LocalToast where the containers are hosted. After editing this rule, the website was now displaying on joelcoulon.com.
To keep my main website stable, I made a second container for hosting the dev site. This was hosted at https://joelcouloncomdev.containers.uwcs.co.uk. I initially planned to make dev.joelcoulon.com CNAME to this site, but due to various complexities with HAProxy, I shelved this idea.
Initial Design
I knew I wanted to have a simple website with not much going on in terms of javascript or fancy animations. I looked at a few websites that I liked the look of and sketched out a rough template of what I wanted mine to look like:
(I tried to find this sketch but I couldn't :(, will update if I find it)
I then created the main page and about me sections (flexbox my beloved). This was a simple process; although it did require me to relearn the various properties of flexbox as some of them are a bit weird. I also created a navbar that would be used on all pages. Although simple, this took a surprisingly long amount of time (~2 days) as I elected to add SVG icons to the navbar, which seemed to evade all attempts to size them correctly.
Another consideration was a mobile view. Whilst the web dev module covered the benefits of having a responsive layout, it never covered how this could be done. I used media queries to change the styling depending on the screen size. I got a decent-looking mobile view in a few hours (mostly by setting flex-direction: column;).
Projects
My main reason for making this website was to demonstrate the various projects that I had worked on. Therefore, I needed some system to display the projects and add new ones. An intelligent person would realise the small scale of this project and would have made a static site with a list of projects. I am not an intelligent person.
I used a database to store the various projects that I had in Markdown. These would then be converted to HTML by a parser and then displayed. CS139 (the webdev module) had covered SQLalchemy, so I decided to use this as the primary DBMS.
The primary concern was security: obviously I wanted to be able to edit and add projects, but I didn't want anyone else to be able to. I decided to use a login system to allow me to edit the database. Flask-login was covered in the module, but it was more intended for a user login system rather than an admin login system with only one user. I made my own login system and set a session variable to true if the correct password was entered. This was simple to implement and worked well. The only extra security features I added were not making the login page url public and rate-limiting login attempts.
I then implemented a version of Flask's @login_required decorator to ensure only logged-in users could access the admin pages. This was my first implementation of decorators and my first realisation that Python had higher order functions. The more you know!
I then created simple admin pages that were just forms that would pre-populate if editing a project or not if creating a new one. Even though they, in theory, could not be accessed, I still required a password for anything to be comitted to the database, just in case a session hijack attack took place.
One cursed implementation I came up with was the combination of the delete and login pages. As part of the admin system for projects, I made a delete page that was simply a password form and a button. As I was the only user of the admin system, this was the same format as the login page. Hence I merged the two.
Another security concern I had with my project pages was XSS. Again, as I was the only one that could edit projects this was not much of a concern but I wanted to do it right. Because the Markdown library I was using outputted the HTML as a string, I had to pass it into the jinja template with the |safe tag which meant if there was ever <script>alert("");</script> in the markdown, it would be executed. This was not ideal.
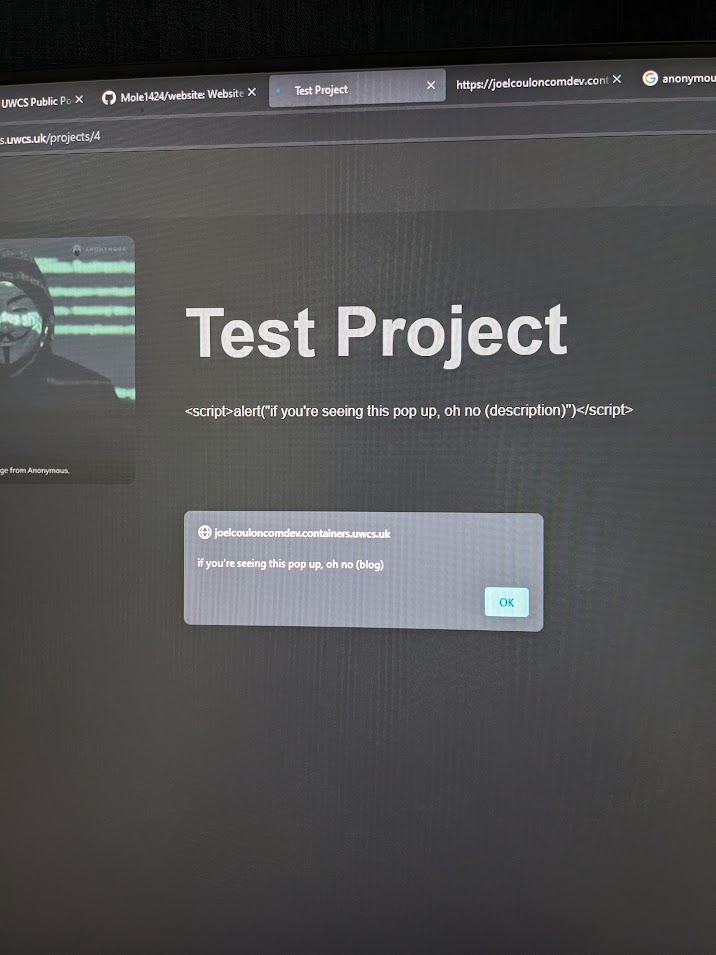
My inital solution was to escape the initial markdown and then pass it into the markdown parser. This worked well but meant I couldn't use any HTML in the markdown. To solve this I added a simple parser that would remove any instances of from a code block as this is where the markdown parser was adding it. This worked well and I was able to use HTML in my markdown. I further added a seconday parser to add strikethrough functionality as this was not supported by the markdown parser.
Displaying Projects
One UI challenge I was facing was how to display my various projects on a page that would be easy to navigate on desktop and mobile. I knew I wanted to use a card system to represent each project as this would allow for a clean look. I eventually settled on a split design: for desktop, I would use a simple but responsive grid system; on mobile, a carousel that I found on the r/webdev subreddit.
These worked really nicely, I spent way too long just playing around resizing the window and watching the cards move around and adapt to all the varying screen sizes.
Conclusion
Overall, I am really happy with how the website turned out. I think it looks nice and the fact that I made it completely from scratch makes me proud. I am also really happy with how the admin system turned out and how (as far as I can tell!) it is actually secure.
The code for the website can be found at https://github.com/Mole1424/website